

Given my more than ten-year affection for UAD, I think I have contributed quite incisively to the spread of this suite of plug-ins. Whoever has to do with me knows perfectly my "Point of View" about it and how I talk about it, but here I will ponder whether to buy the Vari Mu compressor, therefore, armed with iron objectivity, we expose the pros and cons.
The thing that obviously piques my curiosity the most is the obvious comparison between the digital camera and its analogue counterpart with the same settings, as decency wants such comparisons to be made.
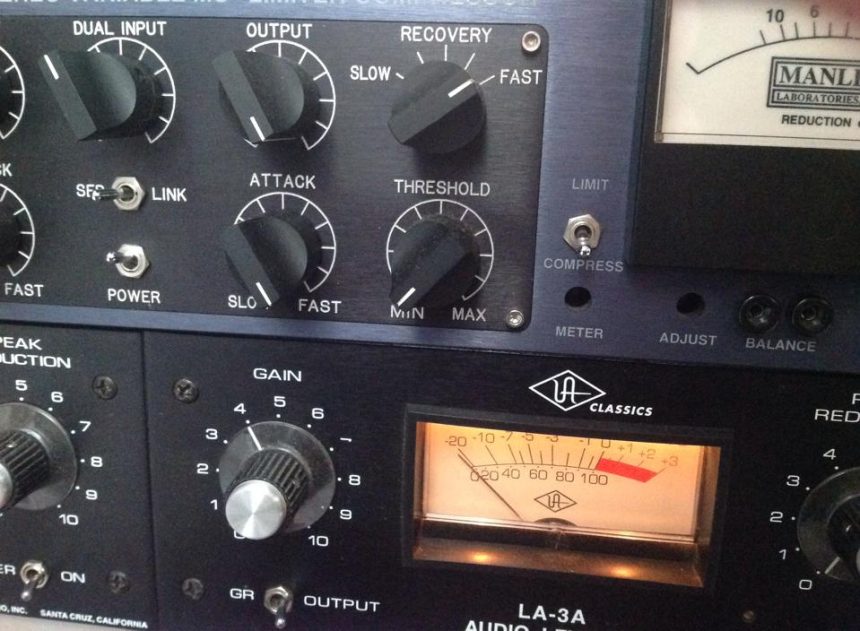
Il Vari-Mu is a variable mu compressor, which means that the deeper the action of the gain reduction the more the compression ratio (ratio) will harden. Therefore, making sure that with a given input voltage the gain reduction behaves in the same way as the hardware is of vital importance (Fig.1).

Watching the video presentation of the Universal Audio, Eve Anna Manley claims that it cannot distinguish (except for the sound of the converters) the emulation from the original. This left me quite amazed and here I am to enter into this simple comparison of groups processed.
Approaching the user interface, I notice that there are all the modifications that can be purchased for the hardware, the internal side chain, the mid side modification; but the thing that attracts my attention above all else is a "screw" that bears the label "HEADROOM ".
I believe that this parameter is a cornerstone for the issue I mentioned in the introduction. The manual tells us that this parameter is useful to reach the best operational levels in a practical way.
In what sense?
When I put the processor (hardware) in INSERT on a track, I'm sure to send it an optimal voltage which I can then balance between input and output to get the desired ratio.
"In the box"Is a bit more complicated because it might happen that you want to use the processor on a track that has a very low volume, and then finding a balance that interests me in the compressor without changing the gain of the waveform could be quite complicated and not easy .
Programmers come to meet us with this function, which allows us to adapt the operational level of the machine (at first glance it seems to me that it increases the input gain before the dual input) to the content of the track.
In any case, for my experiment this parameter changes the cards, because I'm not interested in changing the operational level: I'm sure how much voltage I usually send and how I want the gain reduction to respond.
I keep reading the manual, which unfortunately only indicates that the default position is a 12 hours, but it doesn't tell me which one corresponds to inactive parameter.
Here begins the real comparison: turning on both the Vari Mu hardware (which for use we will call by the name of H) that the digital Vari Mu (D), I realize that, with the HEADROOM parameter in the default position, the gain reduction responds differently, and to make D have a behavior similar to that of H I have to bring HEADROOM to the position totally counterclockwise.
Ok, with this minimum foresight we can begin to process signals and make the necessary comparisons.
A few notes to keep in mind: my car was purchased in 2006, subsequently revalued and recalibrated by authorized assistance in 2010, it had greater exploitation in 2012 and 2013 but in 2014 it was not used regularly; the tubes, with good intentions of my ear, are in a state that allows optimal use (Fig. 2).

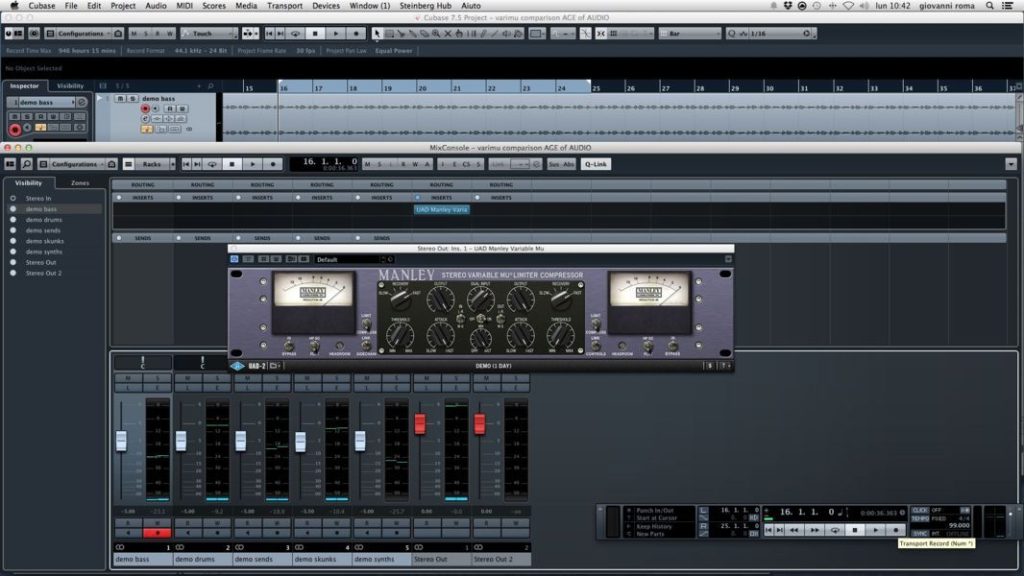
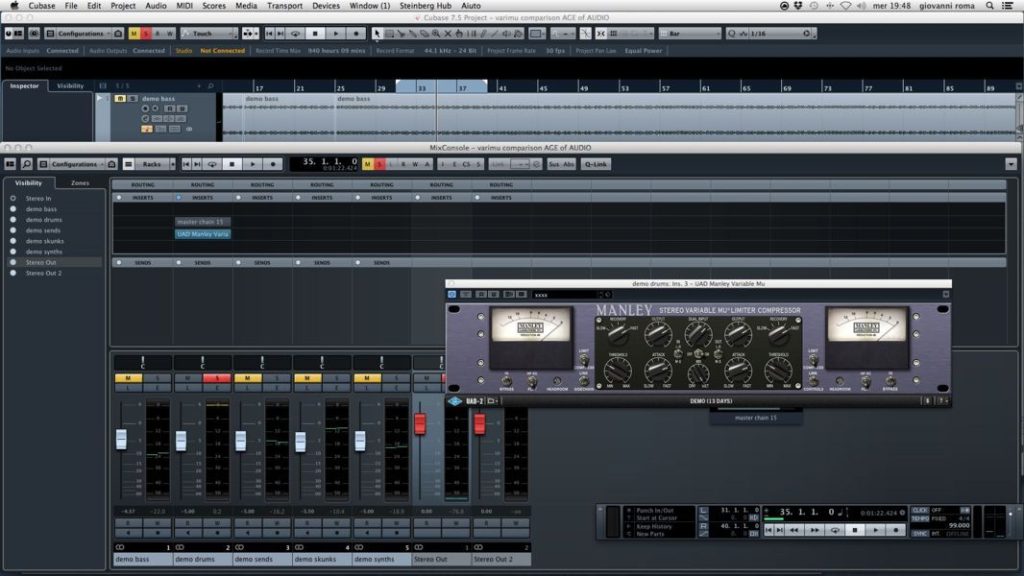
For our test we put the Vari-Mu in insert on the master of Cubase 7.5 wired on one RME Fireface 800, monitoring the return of the converter with DIG CHECK, using my audio productions as demonstration files (Fig.3).

First comparison: master compression
For this test we used my standard settings, i.e. a slight compression that induces a single db of gain reduction on the kick, attack and release as much as possible bpm possible in order to level the transients in an absolutely non-drastic way.
The outputs of the machine are at maximum, to take advantage of all the possible headroom, while with the dual input I go towards the threshold by imposing a db of gain reduction.
The master compression demonstration files consist of 3 comparisons (I recommend opening the files in a sequencer in separate tracks, muting them all, then alternating the solo to compare them to each other).
Note:
Comparison 1.1: audio 1 (flat), audio 2 (UAD), audio 3 (HW) (Fig.4).
A light compression that reaches a maximum - 1 dB of gain reduction.

Comparison 1.2: audio 4 (UAD), audio 5 (HW) (Fig.5).
More intense compression achieved by pushing dual input up to –2 dB gain reduction.
(NB compared to the previous comparison, for my convenience we had to lower the s -the sounds of keyboard and upbeat guitar- by 0.5 db because they exceeded zero after compression).
Comparison 1.3: audio 6 (flat), audio 7 (HW), audio 8 (UAD) (Fig.6).
This more than a master compression is a gamble made to listen to the compressor at more extreme settings. To prevent the compressor output from starting to peak, we lowered the output to half and pushed the dual input further to the limit to achieve - 4 dB of gain reduction. The timing of the GR is very tight, but we can hear something more drastic.

Considerations:
If the first comparison (1.1) had been a blind test, I would not really be able to distinguish one processor from the other: this is a delicate setting that I use often, less invasive and extremely suitable for compressions at various stages.
The second comparison (1.2) offers a couple of interesting insights. Such a setting (- 2db of GR) is something I go to look for if I want the mix to sound a little less elegant, while keeping an eye on the risk that it will start pumping if I continue to keep the release so fast and I insist on increasing the GR.
Comparing the two files, one feels that the one processed via UAD remains vaguely more moderate while the second is much less elegant. It can be seen how, in bar 5 of the file processed with the hardware, a disproportionate volume skunk unbalances the rhythmic pattern of the compressor with respect to the kick drum, thus unduly freeing the bass for the last two kick strokes.
The third comparison is, in my opinion, important because it allows you to observe the impression of the compressor envelope with very fast settings on the cabinet. This shrinks because the ratio has become considerable at this GR level and the attack is too rapid for the transient to develop.
The emulation with this configuration makes it really good, it affects the tone of the case (in the incorrect way I set) with the same effect as the hardware.
Second comparison: buss compression
In this case we are talking about the drum group which also contains part of the snare effects.
Note:
Comparison 2.1: audio 9 (UAD) audio 10 (HW) (Fig.7).
I did a regular buss compression on UAD, the timing seemed regular, then I copied the settings of the digital processor to the analog one and the response of the second was much sharper and faster; a little dissatisfied with this experiment I thought of proceeding with a second test of the same group, that is to make a buss compression that sounds satisfactory on the hardware processor and then copy it to the software.

Comparison 2.2: audio 11 (HW), audio 12 (UAD) (Fig.8).
Considerations:
The release set on this pattern is deliberately short to allow you to clearly observe when the GR goes away.
Listening to the pattern processed with the hardware, you notice the movement of the gain reduction more clearly and you notice that the elements present after a kick are clearly brought upwards, and the upper part of the spectrum is more affected by this process.
In the emulation this thing is less evident, the gain reduction cuts are less sharp. In our example, the kick is a little too noticeable in the mix and tends to drive a little too much.
In comparison 2.2, where the attack times are more or less adequate, you can appreciate the beautiful tonal similarity of the two files. This is the second file that got me thinking that if this were a blind test I would be hard pressed to tell them apart.
Third comparison: digital bassline compression
This is the bassline we listened to in the first examples: it is a synth that would need some editing before being compressed. Precisely for this reason we decided to give it 5 db gain and see how our compressor limiter behaves in this disadvantage situation.
Note:
Comparison 3.1: audio 13 (flat), audio 14 (UAD), audio 15 (HW) (Fig.9).
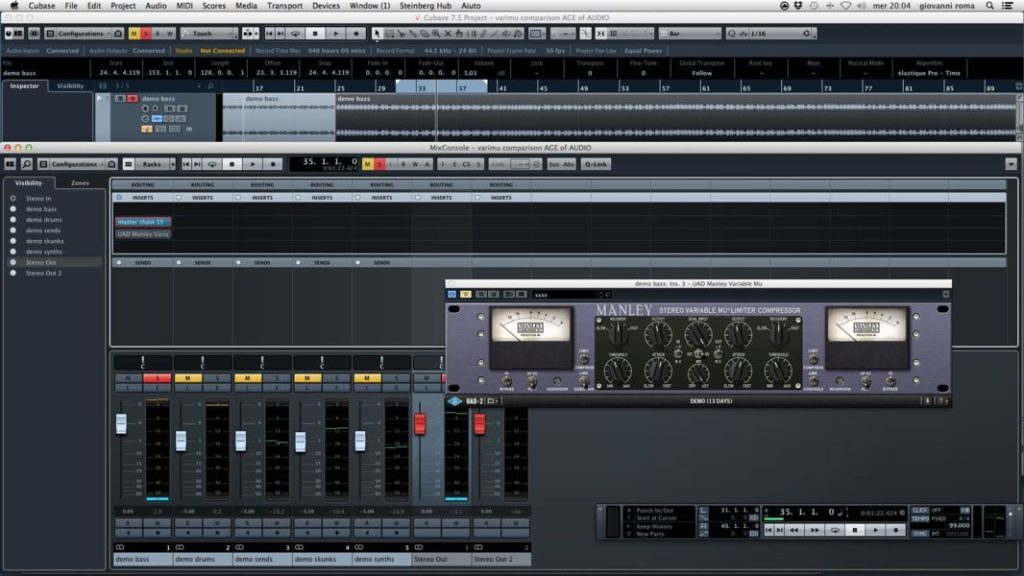
Here something incongruous happens: comparing the bass signal of the digital processor with the analog one, I realize that the sound is totally different. If the virtual it limits the bass down to -4db GR and renders it very clear, the hardware processor with the same settings (I double-checked for at least 20 minutes in a row and was incredulous about it) comes to reduce - 8 db GR but the signal remains dark and, obviously since it undergoes more GR, even smaller.
I therefore thought of doing further processing audio 16 (Fig.10). The dual inputs and increased the output to align the two gain reduction (that digital is that analog) and this is the result.

Considerations:
I was disappointed with this experiment, comparing audio 14 with audio 16, there really is a feeling of excessive flattening of the bass envelope by the digital processor.
The attack of the signal processed by UAD becomes straight, instantaneous, without considering the strange amount of upper harmonics that are opened in an inexplicable way.
I hope that someone proves that there is a mistake, it seems to me an abysmal discrepancy from what we have heard so far.
Summing up:
I will buy the emulation, I find it really convincing for the master compressions that make up the 90 % of the work I use this processor for. I find that in a detectable regime down to - 3 db GR this plug in is linear and believable: taking into account that usually the processing in the Manley is my second compression stage before the limiter, while in the demos I have not used previous stages, I still find more amazing is the relevance and lightness of the Manley UAD. Once again I thank the Universal Audio modelers / programmers for creating tools that improve my production level.
Tail notes:
I realize that I have not shown many aspects of the digital processor, the internal side chain or the MS mod or explored less extensive settings, but it was not my intention to make an overview, I wanted to produce material related to my skills, easily comparable, on which do a little discussion rather than experiment with the possibilities of use.
I realize that the audio material used for the demonstration may be not very illustrative for a part of the audience, being mainly electronic rhythmic and also quite “raw”, but this type of sound is my specialization.
I thank all those who have come this far with the reading and those who want to comment and / or highlight any inaccuracies contained in the article.
Happy gain reduction everyone!
John RomeI have been a UAD user since 2004 and I sincerely believe that I have contributed to spreading this suite of plugins around me. Who knows how I normally express myself, however, since this is the place where I will decide whether or not to buy the Vari Mu compressor, it will be extremely objective in my evaluation.
What is most urgent for me is to get the feedback from the digital processor and hardware in the same settings. The vari-mu is a comprehension with mu variable, which means that the deeper the action of gain reduction, the more the relation of comprehension (ratio) will endure. If vitality matters, make sure that with a certain voltage at the input, the gain reduction occurs in the same way as the hardware does (Fig. 1).
In the presentation video Universal Audio, Eve Anna Manley ensure that you cannot distinguish (except for the sound of the speakers) the emulation of the original. This impressed me so much that I ended up immersed in this simple comparison of the groups processed.
Looking at the user interface, I note that all the modifications that can be purchased for the hardware, the internal side chain, the mid side modification are included, but the one that most called my attention was a “tornillo” with the label: HEADROOM.
I think this parameter is a cardinal point, for the sake of what is stated in the introduction. The manual indicates that this parameter is useful to achieve the best operational levels in a practical way.
¿En que sentido?
When I place the processor (hardware) in insert on a track, I make sure to send it an optimal voltage that can balance between input and salt of the machine to be able to obtain the desired ratio. “In the box” is a little more complicated because I want to use the processor on a track with a very low volume, and without changing the gain of the waveform, I may not easily achieve the balance I am interested in in the comprehender. Programmers searching for the solution have created this function that allows you to adapt the operating level of the machine (I assume, if you increase the input gain before the dual input) to the content of the track. As I experiment, this parameter changes everything and I'm not interested in changing the operating level: normally, if you're sure of how much voltage you send and you're wondering about the gain reduction..
Continue consulting the manual which, unfortunately, only indicates the default position (hour 12), and does not say which parameter corresponds to the inactive one.
Here the real comparison begins: by switching on the Vari Mu hardware (starting from now H) or the Vari Mu digital (D), I'll tell you that with the HEADROOM parameter in the default position, the gain reduction responds in a different way, and to ensure that D and H behave relatively, I need to place the HEADROOM in it totally counterclockwise position.
Ok, knowing this little detail we can start processing the signals to compare them later.
Last preliminary notes: my machine, purchased in 2006, was adjusted by authorized technicians who changed the valves in 2010, during 2012 and 2013 it was used very little and in 2014 none; From what I know, you can decide that the valves are in the optimal state. (Fig. 2)
I will use the Vari-Mu in insert with the Cubase 7.5 master and a red RME fireface 800 cable, monitoring the signal that comes from the converter with DIGICHECK, using my audio productions as demo archives (Fig. 3).
First comparison: master compression
For this test use standard parameters, or if a light understanding is capable of inducing only one db of gain reduction in the box, which is connected and freed as much of the bpm as possible to reveal the transistors moderately. Use the maximum output of the machine to fully adjust the headroom, while with the dual input you adjusted the threshold, imposing a db of reduction in the jaw.
The demo archives, concerning the master compressions, are made up of 3 comparisons (I recommend opening the archives with an independent form sequencer, putting all the tracks on mute, alternating them individually to compare one with another.)
Notes:
Comparación 1.1: audio 1 (flat), audio 2 (UAD), audio 3 (HW) (Fig.4).
A light understanding that maximum output – 1db of gain reduction.
Comparison 1.2: audio 4 (UAD), audio 5 (HW) (Fig.5).
A more intense understanding that is obtained by pumping the input has at least 2 db of gain reduction (NB compared to the previous comparison, for my comfort less than 0.5 db of the skunk (keyboard and guitar sounds at high levels) because they exceed the limit after the understanding).
Comparison 1.3: audio 6 (flat), audio 7 (HW), audio 8 (UAD) (Fig.6).
This, more than a master compression, is a trick you have to make a compressor with the most existing parameters. To prevent the compressor's salt from starting to go to peaks, reduce it to the minimum and maximize the dual input, aiming for 4 dB of gain reduction. The timing of the GR is difficult to maintain but we can hear much more drastic things.
Considerations:
If the first comparison (1.1) was a blind test, you will not be able to distinguish one processor from another: it is a delicate parameter that I use frequently, less invasive and more suitable for understanding various formats.
The second comparison (1.2) offers a number of interesting points. A parameter of this type (- 2db of GR) I look for if the mix is less busy, always checking that no pumping begins, I maintain the release at the same speed and continue to enhance the GR. Comparing the two archives you can see that the one that was processed with UAD is much more moderate than the second one, which is more striking. It can be observed, on track 5 of the archive processed with the hardware, how a skunk with disproportionate volume debalances the rhythmic pattern of the compass with respect to the caja, thus freeing, unduly, the bottom of the last two shots of the caja.
The third comparison, I consider to be important, because it allows to observe the speed of the envolving in the comprehender with parameters much faster in the box, this disminuye, because the ratio increases considerably in this level of GR and the attack is realized very quickly so that the transition can be carried out. The emulation with this configuration works really well, affecting the tone of the box (for me, incorrectly) producing the same effect as the hardware.
Second comparison: buss compression
It is from the battery group that contains part of the snare effects.
Notes:
Comparison 2.1: audio 9 (UAD) audio 10 (HW) (Fig.7).
I realized a buss compression common with UAD, the timing seemed regular to me, I copied the parameters of the digital processor into the analog one and the response of the second one was much more precise and faster. Being dissatisfied with this experiment, I decided to do a second test with the same group, or sea, to make a buss compression where the sound was satisfactory with the hardware processor and then copy it with the software.
Comparison 2.2: audio 11 (HW), audio 12 (UAD) (Fig.8).
Considerations:
The release used for this patron, is deliberately short, as it is, allows you to clearly observe when the GR disappears. When examining the pattern processed with the hardware, we noticed that the gain reduction moved in a sharper form and that the elements located behind a box were shifted further, and the upper part of the spectrum was more influenced by this process. In emulation, this is less noticeable, the gain reduction steps are less clear. In this example, the case is quite evident and tends to drive less.
In comparison 2.2, where the old times are more or less suitable, one can appreciate the beautiful sound of the timbres of the two archives. This is the second file that makes me think that it has been a blind test that has been problematic.
Third section: comparison: digital bassline compression.
If we are talking about the bassline we used in the first examples, a synth that was previously compressed requires some editing, which is why I decided to give it a boost of 5 db and see how the compressor limiter behaved in a situation like this one.
Notas:
Comparison 3.1: audio 13 (flat), audio 14 (UAD), audio 15 (HW) (Fig.9).
And suddenly something incongruent happened: comparing the low signal of the digital processor with the one of the analogue one, I realized that the sound was completely different. The virtual limits the bass to – 4db GR, making it clearer, while the hardware processor with the same parameters (incidentally, I checked it for at least 20 minutes) requires reducing it to – 8 db GR, without producing changes in the signal, which receiving more GR is still dark and more small.
If I am interested in doing further audio processing 16 (Fig.10). Reduce the dual input and increase the output to align the two gain reductions (digital and analog) and this is the result.
Considerations:
A little disappointed with this experiment, comparing audio 14 with audio 16, there is an excessive flattening of the bass curve by part of the digital processor. The beginning of the signal processed by UAD is immediately correct, without considering the extra cantidad of superior harmonics that are inexplicably broken. I hope that someone will realize that there is an error, it seems like a huge discrepancy compared to what we have learned so far.
Botton line:
I will buy the emulation, it seems really convincing to me that it makes up 90% of the work for me using this processor. I consider that with an identifiable rate of speed – 3 dB GR this plug-in is linear and creíble. Bearing in mind that usually the processing in the Manley is the second stage of understanding before the limiter, and that for the demo it was not previously used, I am even more surprising the pertinence and lightness of the Manley UAD. Once again I appreciate the designers/programmers of Universal Audio for having created these tools that improve my production level.
Closing remarks:
I remember that I didn't show many aspects of the digital processor, the internal said chain or the MS mod, or I explored more "broad" parameters, but I wanted to offer an overview, I wanted to produce materials relevant to my skills, easily comparable, which would arouse a little controversy even just by experimenting with the possibilities of use.
I realize that the audio material used for the demonstration, mainly electronic rhythmic and even quite "raw", may not be very illustrative for some of the audience, but this type of sound is my specialty.
I appreciate all those who have continued reading here, and those who wish to comment and/or report any inaccuracies found in the article.
Happy gain reduction everyone!
John Rome